The seedling of this idea started forming many years ago (see below.) Once I decided to tackle the project, things started coming together fairly quick, but I had a few things I had to figure out.
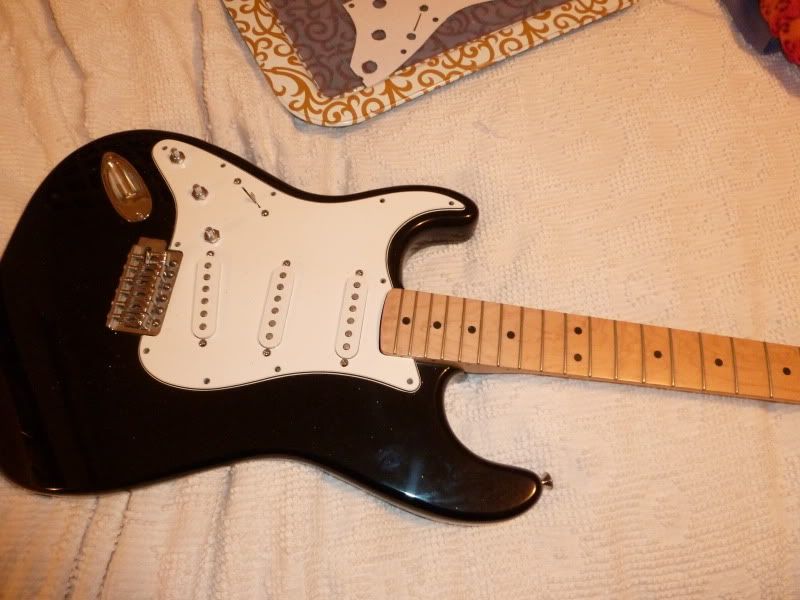 here’s the before: borrrrring!!
I bought the silver sparkle paper at JoAnns, in the open stock paper section. I bought two pieces, which worked out well because the pickguard was just big enough that it wouldn’t fit on one sheet, so I had to make a small piecing at the bottom (which you can see below.) I also used most of the second sheet to test out coatings.
First we removed the strings, and all screws that hold the pickguard to the guitar:
 coming soon: craftswithboyfriends.com
I was originally thinking we could just take the pickguard off and trace it to make a stencil. Shows how much I know… the guard is actually attached to the pickups and knobs, so removing it isn’t a great idea if you don’t know what you are doing. We ended up having to do a little hunting online, and came up with some outlines of right-handed strat pickguards. Thanks to my wonderful and crafty boyfriend, who was able to not only reverse the image but somehow figure out how to print it at fullsize, on multiple sheets of paper which we cut out and taped together, to make a coherent stencil to trace.
Here’s where my mad x-acto skills come into action:
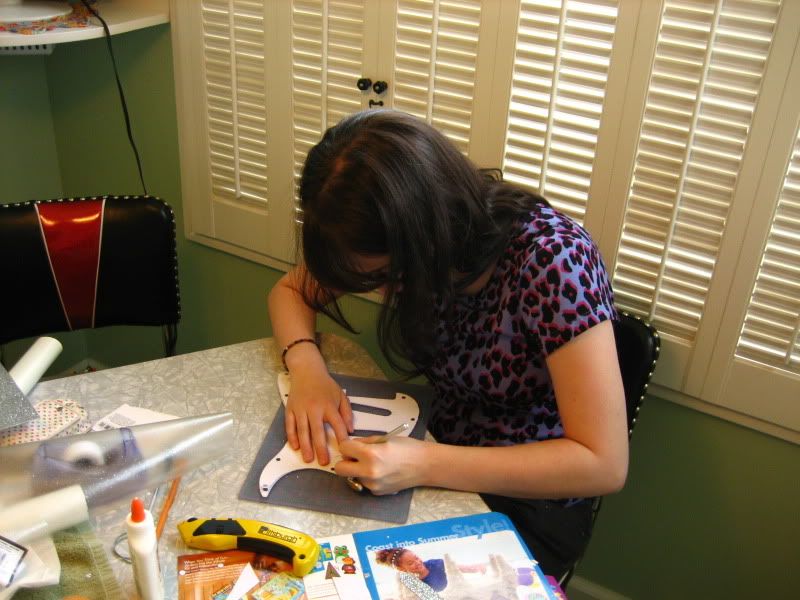
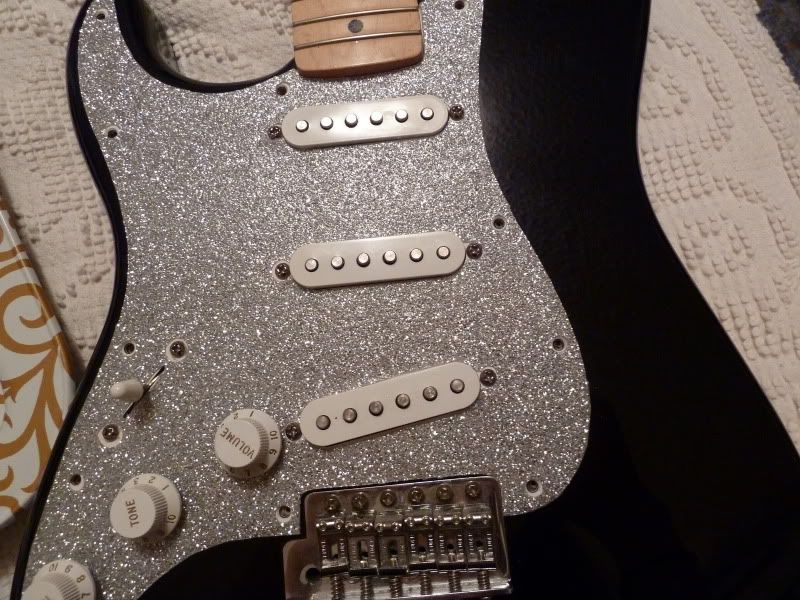
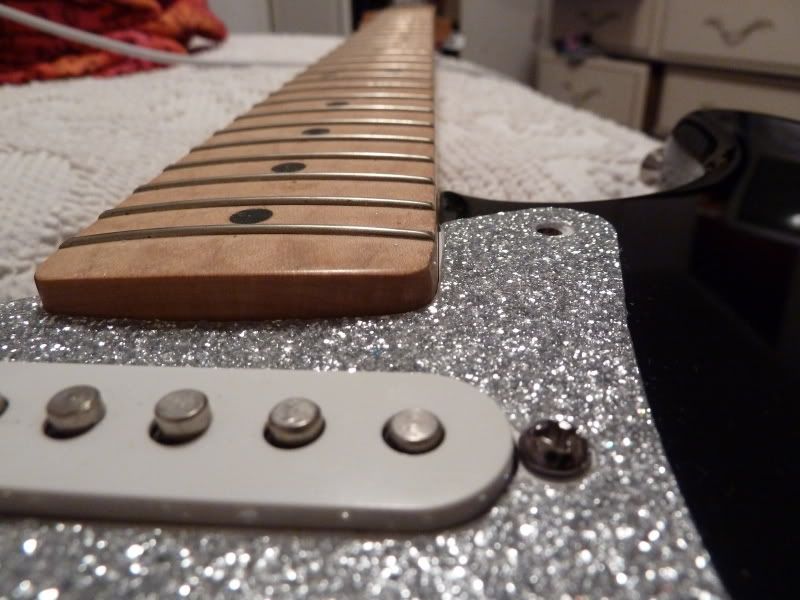
I traced and cut the stencil out of the sparkle paper, and had to painstakingly trim the pickup and knob holes to size so that the piece would fit precisely on the guitar. I am a huge perfectionist and this part was kind of agonizing, for me. Luckily the screw holes were just the right size for a hole punch.
Then came a tricky part. Attaching the paper to the guitar wasn’t an issue at all, because the glitter paper is conveniently sticky-backed, for optimal useage. But, it’s very textured and I knew that would be a problem when playing because it would not only be scratchy on my strumming palm, but it would scratch off really easily when my pick hit it while I was rocking out.
I tried many, many things, and nothing seemed to work as hoped. A few coats of all purpose craft glue, contact paper (wouldn’t even stick to the glitter,) varnish, spray paint top coat, and an actual sparkly sealant. Finally, I realized the answers to all my troubles were encased in a powerful, magical, and attractively labeled orange bottle…..

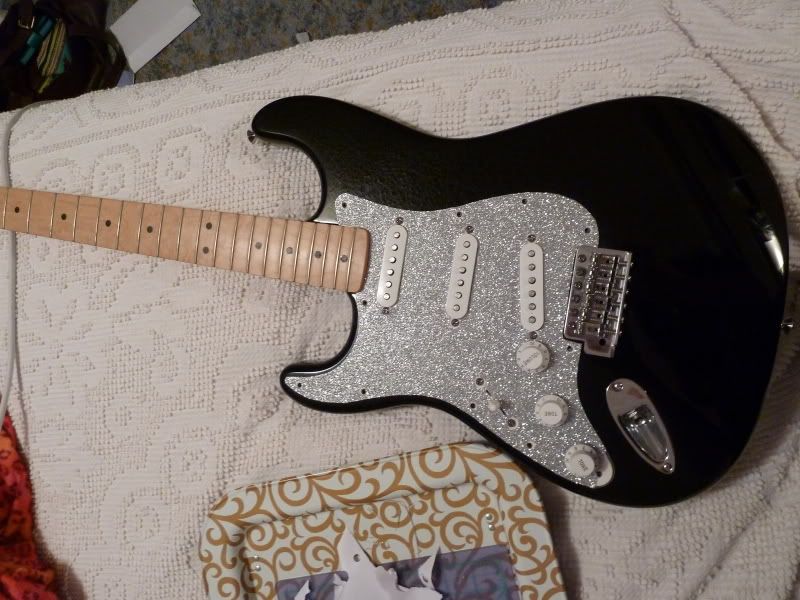
I lost count after about 4 coats, but slopping this baby on there did the trick. While the regular glue made the glitter shine a little flat, mod podge coated without diminishing shine. It also stuck to the glitter better than anything I could think of, and by pooling in the cracks the multiple layers were able to almost completely cover all the pieces. The pickguard is still rough to the touch but not nearly as sand-paper-scratchy as it started out. et voila! behold!
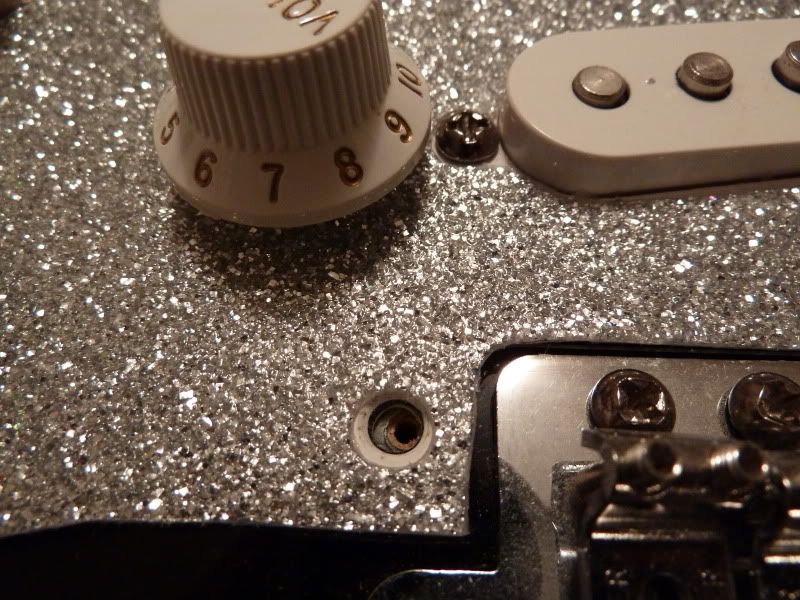
 as you can see above, the tiny corner still needs to be added on.
A huge advantage of the texture is that seams virtually disappear.

The inspiration:
www.agsfb.com/
www.myspace.com/agsfb
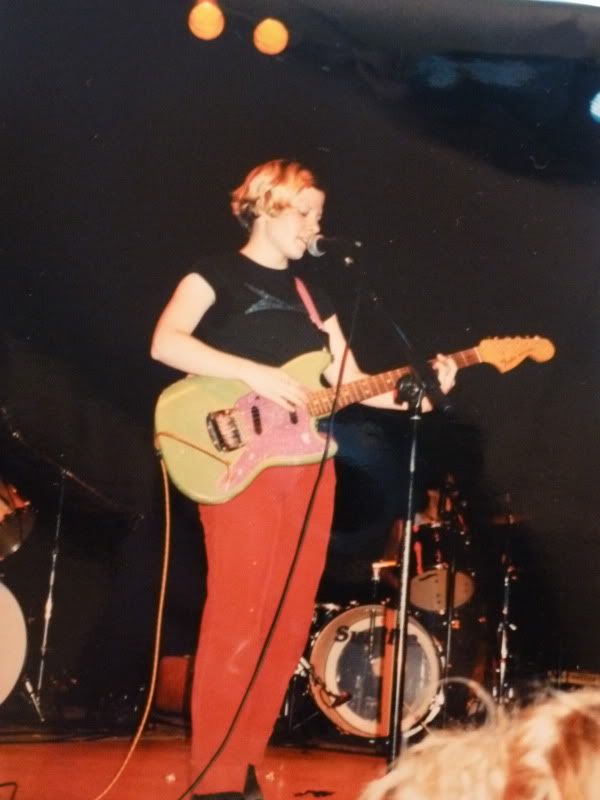
An all time favorite band, I was first introduced to All Girl Summer Fun Band when I was 15, at Girls Rock Camp. Kim, the above pictured guitarist, was one of the instructors for the beginning guitar class. She and a bandmate taught us how to play Smells Like Teen Spirit! I always loved her guitar, lime green with a sparkly pink pickguard… it made my black and white strat look so boring and generic.
AGSFB’s music is just so adorable and fun and innocent, I can’t get enough of it. It has acted as a soundtrack for many fun times in my life, and has been something I bonded over with several close friends. It’s just something you can’t listen to without smiling, and feeling silly and carefree. Kim not only gave me the idea for this project, as early as 9 years ago, she later told me how she did. Who would have thought it would take me this long to get around to trying it!


